• About Us
    • Our Blog Story
    • Advertise
    • contact us
    • Link Parties
    • Our Contributors
    • Founding Editor
  • contact us

Inspired by Family

brave moms. strong families.

  • home
  • family
    • love & marriage
    • parenting
  • Faith
  • feasting
    • appetizers
    • main course & sides
    • dessert
    • drinks
    • breakfast
  • Fun
    • kids crafts
    • home crafts
    • home decor
    • Travel
  • Shop
  • Book

craft kids party ideas

DIY Halloween Treat Toppers

halloween-treat-toppers-1

Contributing Writer: Kelly Griglione from Notable Nest

Are you still looking for something special to make for school Halloween treats, or for certain kids in your neighborhood? These clothes in Halloween treat toppers are quick and inexpensive to make, and can easily be personalized for the recipient. This is also a project your kids can help with, or even make on their own.

Materials needed:

  • clothespins (I found 3 packs of 24 mini clothespins for $1 at a barn sale this morning, otherwise you can find packs of 50 regular-sized clothespins for $1)
  • scrapbook paper
  • transparent bags (50 for $1)
  • circle hole punch or die
  • letter dies/stickers/stamps
  • decorative tape
  • orange marker
  • pen
  • bulk candy.
  1.  Punch out circles. Cut some circles in half. Assemble the circles and monogram as shown above. note: if you are using these for classroom treats you may want to leave the monogram off for ease of distribution. In that case, stamp with a cute Halloween stamp, or just let the patterned paper be the star.
  2. Color clothespins with an orange marker. For the first few I colored all around. Later, I decided just to color the back side to speed up the process.
  3. Write a message saying who it’s from. These say “trick or treat, from Logan & Jack.”
  4. Attach the clothespin to the back of your treat topper. I used glue on some, a tape runner on others.

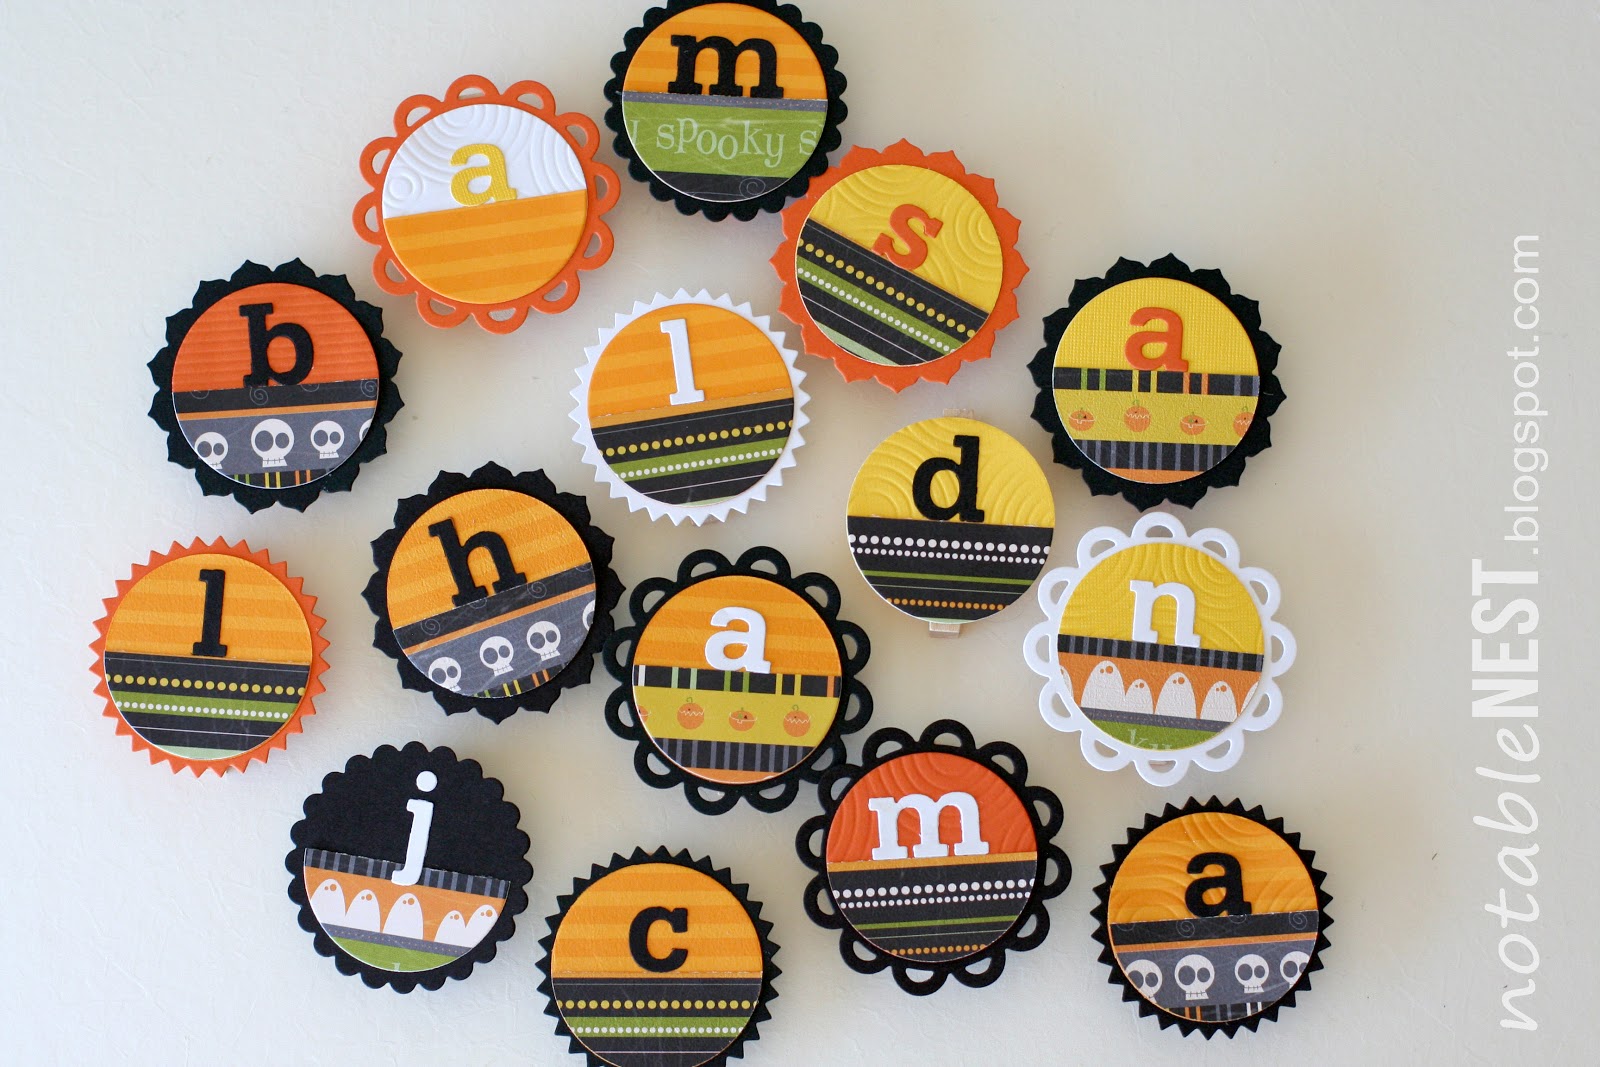
Here are treat toppers I made for our friends in the neighborhood. As you can see, there are many different looks you can get with just a few patterned papers.

If you don’t have many to make, you may want to embellish them with baker’s twine, ribbon, glitter, gems, tags, whatever you can dream up. But they also look good as they are. I had 15 to make, so I kept it simple and left the embellishments off.

Fill bags with candy and seal with decorative tape on the back. Then just clip on the treat topper. Aren’t they so festive all together?

When the kids are done with their candy they can use the personalized clip to add Halloween festiveness just about anywhere.  Here they are attached to a Halloween tree, just like ornaments. The kids can clip the treat topper to their backpack, handles on their dresser, a pair of socks, where ever they would like.

Another option is to add a magnet to the back so the treat topper can be used on the refrigerator to hold notes, grocery lists, art projects, etc.

These treat toppers are a great way to add a little something special to any Halloween treats you’re handing out. If you don’t want to fill treat bags, just clip them to prepackaged items like a bag of pretzels. You can make these as quick or involved as you’d like.

Thanks for looking!

Share this:

  • Facebook
  • Twitter
  • Google
  • Pinterest
  • More
  • Print
  • Email
  • LinkedIn
  • Tumblr
  • Reddit
  • Pocket

Related Posts You Will Enjoy!

  • DIY Halloween Treat Bags

    I have one child in particular who doesn't really care for crafts, so if  I…

  • Healthy Halloween Treat: Boo-nanas

    We've been having fun with Halloween treats these past weeks.  This was my latest healthy…

  • DIY Simple Treat Favor Bags

    I love Treat Favor Bags, it's one of my favorite ways to end a party!…

  • DIY Halloween Card Creations

    . Contributing Writer: Kellly Griglione from the Notable Nest For me, Halloween cards are some of…


8 Comments

« Baked Turkey Meatballs
Fear, Anger and Bitterness Keep Me Company »

Comments

  1. Rita says

    October 25, 2012 at 8:32 am

    These are so cute, I can’t wait to make some for the grandkids! Thanks for sharing.

    Reply
    • Kelly Griglione says

      October 25, 2012 at 6:39 pm

      Hi Rita, oh that makes me so happy to hear you’re going to try them for your grandkids! I’d love to see how they turn out!!

      Reply
  2. di says

    October 25, 2012 at 11:17 am

    So cute! Very pin worthy! Thanks for the great tute!

    Reply
    • Kelly Griglione says

      October 25, 2012 at 6:41 pm

      Hi Di, thanks so much for your comment, I hope you find some time to make a few (but if now, this would also work for the winter holidays just around the corner!!!)

      Reply
  3. katiesnestingspot says

    October 25, 2012 at 8:42 pm

    How cute, I love all the different kinds of borders you used for your circles and the handwritten message on the clothes pins. It’s great to see a couple different ways to use the toppers. Thanks for sharing with us on A Crafty Soiree!

    Reply
  4. JoAnn @ SweetPepperRose says

    October 30, 2012 at 4:50 pm

    Very cute craft!

    Reply

Leave a Reply Cancel reply

Your email address will not be published. Required fields are marked *

About Inspired by Familia Inspired by Familia on Facebook Pinterest Google Plus Twitter Image Map

Inspired by Familia

Newly Released Book! Click on Images

Get your free printable now! Click on image below.

© Inspired by Family (also known as ME Mari Eugenia), 2013. Unauthorized use and/or duplication of this material without express and written permission from the owner of Inspired by Family is strictly prohibited. One picture with a link back may be used provided that full and clear credit is given to Inspired by Family and with appropriate and specific direction to the original content. Copying a post partially, or fully, is strictly prohibited. Disclosure: Mari Hernandez-Tuten is a participant in the Amazon Services LLC Associates Program, an affiliate advertising program designed to provide a means for sites to earn advertising fees by advertising and linking to amazon.com.

To view click on a image below!

Subscribe to our weekly newsletters and be the first to receive all of our free printables!


  • Printable Book Report Forms {Elementary}
  • A Fun Way to Teach Table Manners to Kids
  • Creative Date Ideas for Busy Parents: A Year of Dating Your Spouse
  • Kids Party Idea: Dinosaur Party
  • Valentine's Day Paper Bag Crafts
  • Lunch Box Jokes
  • Children's Books About Mexican Culture
  • Valentine's Day Printable: "You've Been Heart Attacked" Activity

Archives

Categories

More Great Posts on All Things Family!

Summer Fun: Ice Cream in a Bag

Summer Fun: Ice Cream in a Bag

Camping Hacks: Campfire Fire Bombs & Upside Down Campfire

Camping Hacks: Campfire Fire Bombs & Upside Down Campfire

Gratitude Nature Hike

Gratitude Nature Hike

Why We Picked LEGOLAND Over Disney World

Why We Picked LEGOLAND Over Disney World

Kids Christmas Party & Games

© Mari Hernandez-Tuten, Founder and Editor of Inspired by Family Magazine 2012-present.As an Amazon Associate I earn from qualifying purchases.
Unauthorized use and/or duplication of this material without express and written permission from this blog’s author and/or owner is strictly prohibited. Excerpts (no more then 2 sentences) with a link back to content may be used, provided that full and clear credit is given to Mari Hernandez-Tuten of Inspired by Family Magazine with appropriate and specific link to the original content.

MyFreeCopyright.com Registered & Protected

Copyright © 2021 · Divine theme by Restored 316

loading Cancel
Post was not sent - check your email addresses!
Email check failed, please try again
Sorry, your blog cannot share posts by email.