
Every year my boys beg me to purchase a Christmas Village after we come back from viewing the amazing display at The Christmas Store which I am sure it cost $1000’s of dollars but they don’t understand that. We like to frequent the Christmas villages as a part of our holiday outing especially if they have trains and now our 2 year old screams in amazement. This year I went online looking for ideas on how to make one. I found one at my favorite kids magazine Family Fun and I was inspired and decided we had to make our very own village.
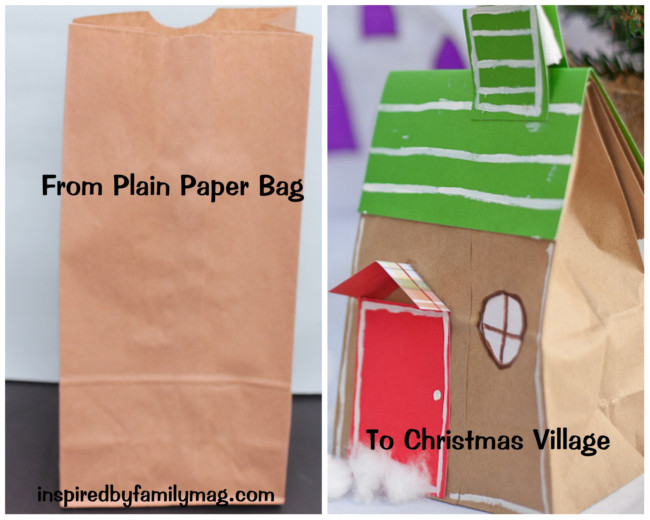
This cheery christmas village is made from paper bags and was featured in The Spirit of Christmas Winter Issue.
You can follow along via: Twitter, Pinterest or Facebook and our readers preferred way via email.
What you need is:
- Paper bags
- colorful crafting paper
- Paint
- Tissue Paper
1. First decide if you want your house door to be on the side of the bag or in the front of the bag.
2. Cut out your roof by making a long rectangle shape that covers the top of the bag. Fold it in half and cover the top of the bag.
3. Make your doors and windows. If you want to get fancy cut out the windows and replace them with tissue. That way if you decide to use battery operated candles, the light shines through the candles.
4. Once you have glued on your doors and windows take your paint and outline the sides of the house.

go here for the cheery version from The Spirit of Christmas Issue or here from Endlessly Inspired’s or here for A Fields Journal’s Pastel version and go here for Burst of Creativity’s version.
Photography of the cheery Christmas Village by Carla Ackermann.